Tuesday 31 March 2015

More simple colouring

I made another card using some simple colouring with my Promarkers.


For this card, I randomly stamped a variety of flowers from a stamp set I bought at a Dutch bargain store a few years ago, but never used until now. After colouring most of the flowers, I went over all of the lines using a Letraset fineliner (a trick I picked up from Kathy). Of course, I could not help but add some Wink of Stella to some flower hearts and petals. I die cut a panel using a stitched rectangle die from Simon Says Stamp and then cut away a diagonal strip using another SSS die. I heat embossed the sentiment (Hero Arts) using Liquid platinum embossing powder (Ranger) and then popped up the panel pieces using foam tape.

Still colouring along with Kathy

I've been trying to keep up with Kathy Racoosin's 30 day colouring challenge and I'm now trying to turn some of these coloured pieces into cards.

To get me started on some colouring with my Promarkers, I browsed my collection of digital images and one of the images I found was this (never before used) image by Pauline of TLC Creations. Perfect for a quick card AND for using my NBUS.


I decided to go with rainbow colours and some clear Wink of Stella and frame it using black cardstock and an oval die from a die set by Die'sire (Cameo Stamping Frame), a set I've had for quite a while but never used so far. For a finishing touch and a little more festive sparkle, I added a few clear sparkling sequins by Pretty Pink Posh (more NBUS).

I'm linking this up for the following challenges:


Saturday 14 March 2015

Just a note

Today, I had some time to turn one of the pieces of this post into a card, just in time to link it up for the 300th Challenge celebrations over at Cupcake Inspirations. After all, I had picked my colours to match those of their colour challenge.

I trimmed my coloured piece so that only a small black border was showing and then ran it through my Cuttlebug with a piece of Ninah Solar White cardstock and one of the dies from the Stitched Rectangles set from Simon Says Stamp. I then stamped the sentiment (Impression Obsession) using Archival jet black ink and adhered my panel ont my card base using foam tape.


I'm entering my card into the following challenges:

Cupcake Inspirations - Colour challenge


Craft Your Passion - 252 Always anything goes
Party Time Tuesdays - 196 Anything goes
Sweet Stamps - 212 Anything goes

Wednesday 11 March 2015

Vibrant Christmas - Take Two

Here's another card that was inspired by this fortnight's challenge prompt of the lovely Jingle Belles. Apart from the colours, I was also inspired by the gold flourishes against the black of the placemats.


 For this card I wanted a little play with my new Gelatos. Because I had read they could be used on dark cardstock, I took a piece of black cardstock and blended some colours using my fingers. I then heat-embossed the gorgeous stag stamp by Flourishes in gold. I die cut the panel and the thin frame (from pink metallic cardstock) using a Simon Says Stamp die and then went overboard again with my sequins.

I'm entering my card into the following challenges:


Jingle Belles - A very vibrant Christmas


Cupcake Inspirations - 300th Challenge Celebration - Sparkle Inspiration Challenge


Happy Little Stampers - Sponging 
(I trust using my fingers as a bleding tool also counts)

Vibrant Christmas. - Take One

This weekend, I spent more time colouring. I was inspired by Kathy Racoosin's card for day 3 of her 30 day colouring challenge. She also inspired me to try using my Inktense pencils with my Aquamarker blender pen.


For the colours, I was inspired by this wonderful photograph on the Jingle Belles blog. I used more muted colours for the background, went a bit brighter with the tree and then went a little overboard with the sequins. And since I couldn't find my Wink of Stella marker, I used Perfect Pearls to add some shimmer to the tree.

I'm entering my card into the following challenges:


Jingle Belles - A very vibrant Christmas


Cupcake Inspiration300th Challenge Celebration - Confetti Inspiration Challenge


CASology - Week 137 Tropical


Friday Mashup - FM200 Combine 2 previous challenges
178 - Vellun and/or stitching (faux or real)
188 - Silver/gold and/or Christmas


Sunday 8 March 2015

Promarker/Flexmarker colouring practice

A quick post from me showing the flowers I coloured today using the practice sheets from the OCC Copics class I took a while back. This image was drawn by Kristina Werner, one of the teachers for this class.


For me, Kathy Racoosin's 30 day colouring challenge offers a great opportunity to practise a little more using my Promarkers and Flexmarkers using the tips, tricks and videos from this Copics class. Before I started colouring, I watched Sandy Allnock's video about colouring these flowers again and then set out colouring the flowers using the red, yellow and green colour combinations I had tested when I first took the class.


30 day colouring challenge with Kathy Racoosin

When I read that the lovely and utterly talented Kathy Racoosin of The Daily Marker is hosting a 30 day colouring challenge from March 4 to April 2, I knew I wanted to join in. It's all about the joy of colouring, if only for 5 to 10 minutes a day.

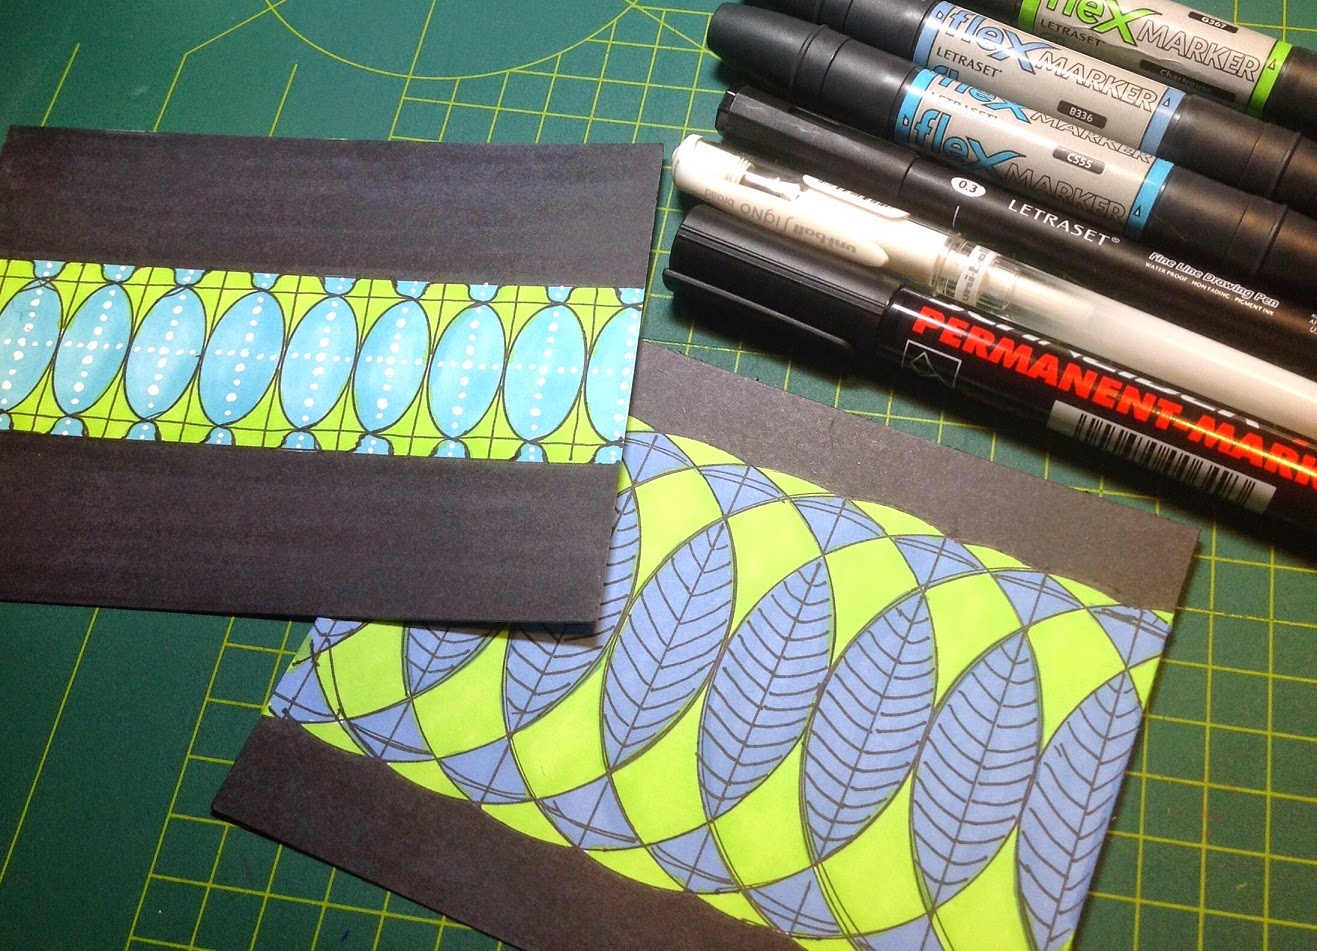
My coloured pieces below were based on Kathy's inspiration video on day 2. The first picture shows the colours a little better than the second picture, yet the second picture shows all the supplies I used.


For the bottom card I started by drawing circles using the inside of a roll of painter's tape, shifting the roll sideways to draw overlapping circles. I then coloured in the different areas using Flexmarkers and decided to colour the remaining white areas using a permanent black marker I had on hand. Lastly, I added the leaflike veins and a few more lines using a thin black Letraset marker (0.3 mm).

For my second card (top left) I used the small label die from the set of CutUps from The Cat's Pajamas. I didn't like the big areas I got at first, so I did some more overlapping and ended up with those oval shapes. Beforehand I had no idea that the basic shape would be a perfect base for 3 of these ovals, but it turned out great. After colouring I tried adding some white dots using a white gel pen and then added a few black lines as well. My white dots did not turn out the way I would have liked, but hey, I didn't get a chance to practise as much as Kathy did LOL.

I do have a few ideas on how to turn these pieces into cards, but since the challenge is all about the colouring and not so much about creating cards, I thought I would post my pieces separately.


So how about joining us for a bit of colouring for the fun of it? Go check out Kathy's blog for all the details. You will want to visit her blog anyway, if you haven't already, since she is a really inspiring card maker. During this challenge, she will be posting lots of inspiration and videos using all kinds of colouring mediums.