Wednesday, 27 March 2019

Winter birds

When I created my recent Hugs card, I used only the central part of my glittery texture paste panel and decided I could use the left-over frame on another card. So here it is.


I used stamps from a Hunkydory set to create my little scene within my frame. I started by stamping the penguin's sweater in Eucalyptus ink (Catherine Pooler), masking it before stamping the penguin and the other images and sentiment in black Archival ink. I coloured my images using Prismacolor pencils and then foam mounted my glittery frame. Easy peasy. Another card for my Christmas stash.

I'm playing at:

Jingle Belles - Rockin' Robin (or more generally: Birds)

Allsorts - #512 Feathered friends


Winter Wonderland - Fuzzy wuzzy

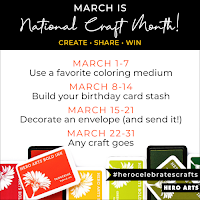
Hero Arts - National Craft Month
(colouring with pencils)


Since it's the end of the month, it's also time
 for the March Rudolph Days
which is hosted by Maureen (Scrappymo)


Monday, 25 March 2019

Faux stained glass 2

For this card, I created the faux stained glass look using glossy accents onto an ink blended background. After creating my faux stained glass, I added a black layer on top and then repositioned my original die cut panel over my ink blended panel, using an embossing stylus to go around the layered die cuts to make sure it sat snugly around my flowers.


I'm playing at:

CAS Mix Up - Stamping, faux stained glass, ink blending, die cutting


Uniko - #52 Spring


Alphabet challenge - Z for Zesty colours

JUG - #480 Photo week
(I went with the bright colours of the balloons)


Faux stained glass 1

I created a faux stained window by heat embossing part of my NBUS Arabesque Medallion stamp (Altenew) in rose gold ep (SSS) onto vellum and colouring on the back using Promarkers (Limited Edition sets).


I'm playing at:

CAS Mix Up - Stamping, Faux stained glass,
heat embossing, colouring, die cutting


Sweet Stampin' - Anything goes (no Shakespeare for me)

I love Promarkers - #380 Anything goes

Stencil ghosting

Due to computer issues, this will be another short post.


I blended CP inks onto Neenah solar white and then used a stencil and a damp paper towel to lift some of the ink. I added some stamping, added a frame using a PB die and mounted my card on a black card base.

I'm playing at:

CAS Stencil - Ghosting


ATCAS - #155 Green


Balloon twofer

I managed to create two cards for this month's Twofer challenge, which is all about balloons.


I'm playing at:

Twofer challenge - #14 Balloons


Here's a close-up of the first one. The background was made by applying DIY glitter embossing paste (translucent paste + glitter embossing powder by WOW!) through a dot stencil. The striped die is by Papertry Ink (Mix & Match: Flourishes). The balloon die is by Marianne Design and was cut from an ink-blended (CP ink) panel. The hugs die (MFT) has 3 layers adhered together. For the top layer, I used direct to paper using CP ink.


I'm linking up this card at:

Time Out - #131 5th Birthday celebrations
(I went with the hugs for this one)


HLS - Anything goes with dies


Day of the Month Card Club - I want you to be Happy Day
Apparently, this day is being celebrated on March, 3rd,
but I guess this day is worth celebrating any day of the year.
Thanks, Cornelia, Rosi and Gundi, for starting this new card club!


For my second card, I die cut a stencil from Yupo paper using the PTI ink die and then blended CP ink throught the stencil to create a subtle background. I used several green CP inks to blend the cardstock for my balloon turned shamrock. The sentiment (MFT) was heat embossed in gold (Papermania). A few jewels finish off the design.

I'm linking up this card at:

Watercooler Wednesday - WWC213 Masculine


Seize the Birthday - #161 Dots and stripes
(The stripes are definitely there and so are the dots, be it very subtly)


HLS CAS - Special day


ATCAS - #155 Green


Sunday, 24 March 2019

Watercolouring on vellum

This month's challenge at CAS Watercolour was to watercolour on vellum, something I have never tried before, so this was the perfect time to try this technique as well as using more of the supplies I have been hoarding.


I pulled out my NBUS Beautiful set by Altenew and heat embossed the image in gold ep (Papermania). I dabbed several CP inks onto an acrylic block and used that as my palette, picking up the ink (and extra water) with a filled water brush to colour in the image.

BTW, after I had finished colouring, I spritzed the remaining ink on my palette with a little water and 'stamped' my block onto a panel of watercolour card, which I then used for this Christmas card.

I fussy cut the image and used some glue dots in strategic places to add it to a panel that I had die cut using one of the dies from the Mix & Mat: Flourishes set (Papertrey Ink). I had not used the separate dies until now, but I do love how elegant this one looks when used on its own. I used thin foam tape to adhere my panel to my apple green card.

I finished off with a sentiment strip (SSS & Papermania gold ep) and a few gold sequins (Pretty Pink Posh).

I'm playing at:

CAS Watercolour - Watercolour on vellum


Hero Arts - National Craft Month - bulding my birthday stash


Seize the Birthday - #161 Anything goes (no toppings for me)


Uniko - #52 Spring (optional: Easter)


Time Out - #131 5th Birthday challenge
(I went with the Birthday wishes)


Saturday, 16 March 2019

Happy Birthday with Winnie and Walter

This is my last entry for the birthday celebrations at the Winnie and Walter blog. And it's not even a Christmas card (gasp) but a set of quick and easy birthday cards using W&W's Mini Scenery: Round and Round.


Creating my panels was dead easy thanks to the MISTI. I started by stamping the image in two opposite corners of each panel, rotating the panel after each stamping. I used 4 colours of Cathering Pooler ink (Black Jack, Stone Blue, Rose Petals and Sauna). Next I repositioned my stamp and stamped the remaining two corners of each panel. After that I stamped the sentiment (Sugar Rush, Winnie and Walter) in black and then mounted all panels onto my white card bases.

I'm linking up my card at:

w&w 5th Birthday Bash | Card set with Heather


The inspiration for my cards came from the current sketch at CAS(e) this Sketch


I'm also playing at:

Seize the Birthday - #161 No toppings for me


(Building my birthday card stash)


The more the merrier with Winnie and Walter

Hello again! I'm back with my third Merry card. I wasn't sure if I could finish it tonight but I managed.


On this card, I used the left over white die cuts from the previous 2 cards plus the one that I cut out of my green brushos panel before inlaying the white letters. I'm now left with one more Grand Merry die cut, because I started adhering the green version one layer too early, so that it has 2 layers instead of the 3 I had intended. To dress up my die cuts, I addded some Versamark ink to the top edge of my green letters and to a sort of cascading line over the white letters, added my brand-new WOW! embossing glitter (Under the sea) and used a hot heat tool to heat set it. The stamped sentiment is from the Comfort + Joy set by Winnie and Walter.

Below is a picture of all three cards that I created using the Grand Merry dies as my starting point. Love how one design led to another and I also love how they turned out differently.


I'm linking up my trio of cards at:

w&w 5th Birthday Bash | Card set challenge with Heather


I'm linking up my single card at:

w&w 5th Birthday Bash | Five challenge with Shay
(5 5-letter sentiment die cuts)

w&w 5th Birthday Bash | Layering die cuts with Jessica

w&w 5th Birthday Bash | Customize die cuts with Crystal

HLS - March Anything goes with dies


HLS Christmas - March anything Christmas goes


Friday, 15 March 2019

More merriness with Winnie and Walter

I have another Merry Winnie and Walter card to share, which was made using snippets.


I needed a few more white Merrry die cuts (for a card that is not quite finished) and when I went to die cut them from a snippet of white cardstock I thought I might just as well try to die cut them neatly so that I could use my panel on yet another card. I adhered it to a panel that was the result from smooshing my acrylic block after doing some watercolouring using CP inks. The background panel was created from a snippet of shimmery cardstock and the stamped sentiment strip (W&W, Sending you with Evelyn T Designs) was another snippet (after converting A4 cardstock to 4 panels for US A2-sized cards)

I'm playing at:

w&w 5th Birthday Bash | Five challenge with Shay
(5-letter die cuts, 5 layers, 5 star sequins)


Merry Little Christmas - MLCCB #8 March anything Christmas goes


Mix It Up - #23 Anything goes (optional: inked background)


Very Merry with Winnie and Walter

Hi there! I've been squeezing in some crafty time here and there this week to create a few more cards for the 5th birthday celebrations at the Winnie and Walter blog.


For this card I used my NBUS Grand Merry stamps and cutaways that I bought using a W&W gift certificate that I won by playing in one of their challenges.

Initially, I had intended to inlay all of the Merry's back into my panel for an almost white card but changed my mind when I found this wonderful brushos panel in my UFO box. So I adhered my die cut panel onto the brushos panel, inlaid the white Merry into the 4th position and adhered the scripty Merry on top. To create this, I die cut the sentiment from matte silver cardstock, used my MISTI to stamp the sentiment in black Versafine and then heat embossed it in Judikins irridenscent sparkle embossing powder. I did the same with the star.

Below is a close-up of the shimmery sentiment.


I'm playing at:


w&w 5th Birthday Bash | Five challenge with Shay
(I used 5 large (5-letter) Merry's on my card)

w&w 5th Birthday Bash | Layering die cuts with Jessica

w&w 5th Birthday Bash | Customize die cuts with Crystal
(I used a brushos panel for my negative space and added glitter ep to my scripty Merry)

I'm also linking up my card at:

HLS - Anything goes with dies


HLS - Christmas (without the option)


Christmas at Sweet Stampin' - Anything Christmas goes 
(optional: include some stamping)